WPF C# Tutorial – Make a simple image gallery in visual studio
- Subject: WPF C# Tutorials
- Learning Time: 1 hour
This is the default values of our XML file now.
<Window x:Class="image_gallery.MainWindow"
        xmlns="http://schemas.microsoft.com/winfx/2006/xaml/presentation"
        xmlns:x="http://schemas.microsoft.com/winfx/2006/xaml"
        xmlns:d="http://schemas.microsoft.com/expression/blend/2008"
        xmlns:mc="http://schemas.openxmlformats.org/markup-compatibility/2006"
        xmlns:local="clr-namespace:image_gallery"
        mc:Ignorable="d"
        Title="MainWindow" Height="350" Width="525">
    <Grid>

    </Grid>
</Window>
Now lets add a few things to it for the image gallery app.
<Window x:Class="image_gallery.MainWindow"
        xmlns="http://schemas.microsoft.com/winfx/2006/xaml/presentation"
        xmlns:x="http://schemas.microsoft.com/winfx/2006/xaml"
        xmlns:d="http://schemas.microsoft.com/expression/blend/2008"
        xmlns:mc="http://schemas.openxmlformats.org/markup-compatibility/2006"
        xmlns:local="clr-namespace:image_gallery"
        mc:Ignorable="d"
        Title="Image Gallery" Height="350" Width="525">
    <Grid>
        <Image Name="picHolder" Stretch="Uniform"  Source="pics/1.jpg" Margin="75,10,90,56" />
        <Button Height="20" Width="60" Click="goNext" VerticalAlignment="Bottom" Content="Next" Margin="331,0,126,10" />
        <Button Height="20" Width="60" Click="goBack" VerticalAlignment="Bottom" Content="Back" Margin="118,0,339,10" />
    </Grid>
</Window>
First we changed the title of the app to Image Gallery.
Inside the Grid panel we have added an Image tag named picHolder, this name will be used in C# script to call it and change the source image. Then we are using the stretch option, this option tells the app how we want to see the image, we are using the uniform option because we don’t want the image to be too stretched, these kitties are too sensitive so lets be nice. Lastly in this tag we are using the source option. This option tells the app where the image is saved. See we are using pics/1.jpg meaning inside the pics folder find the image 1.jpg.
After that main tag we have the two button both of these buttons have similar options except the CLICK options. Inside the CLICK option we have the value goNext and goBack these will be the events linked to the buttons so each time they are clicked each of these functions will run. By default visual studio doesn’t add the events to the button we have to give it straight instructions before they can do.
This is what the program looks like now –
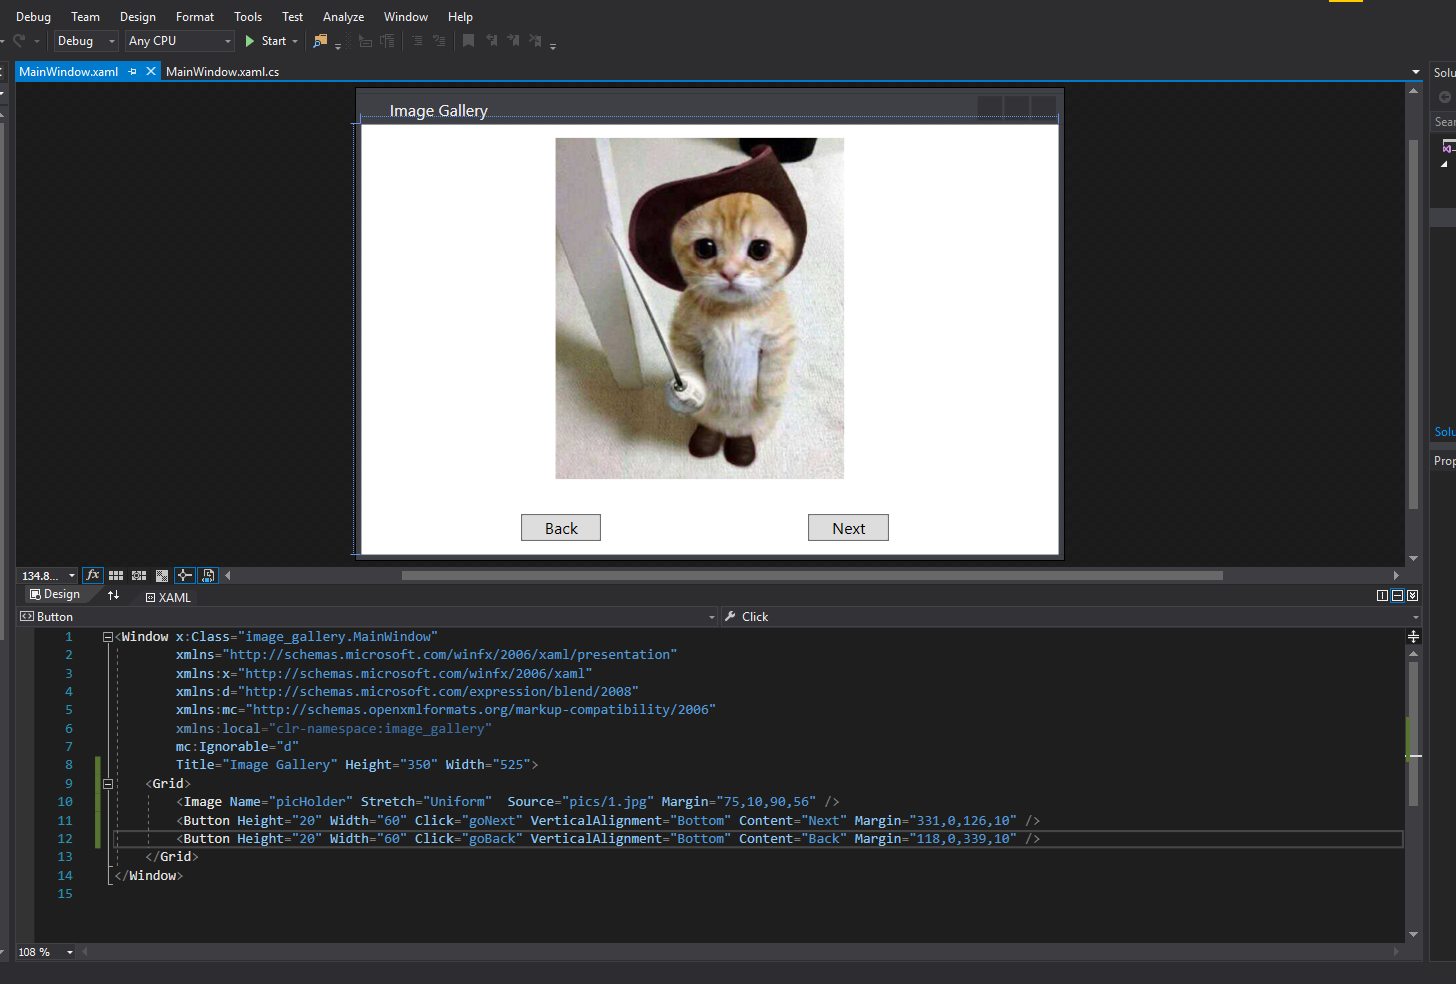
Our cute cats are showing up, excellent I can just stare at this one and finish this tutorial early, well I still want to see the other kittens, fair enough lets continue.

Right click on the goNext keyword in the XAML code and click on go to defition. This will take you to the code view inserting the goNext event. Do the same for the goBack keyword.
Lets take a look at the C# script now.
using System;
using System.Collections.Generic;
using System.Linq;
using System.Text;
using System.Threading.Tasks;
using System.Windows;
using System.Windows.Controls;
using System.Windows.Data;
using System.Windows.Documents;
using System.Windows.Input;
using System.Windows.Media;
using System.Windows.Media.Imaging;
using System.Windows.Navigation;
using System.Windows.Shapes;

namespace image_gallery
{
    /// <summary>
    /// Interaction logic for MainWindow.xaml
    /// </summary>
    public partial class MainWindow : Window
    {
        public MainWindow()
        {
            InitializeComponent();
        }

        private void goNext(object sender, RoutedEventArgs e)
        {

        }

        private void goBack(object sender, RoutedEventArgs e)
        {

        }
    }
}
As you can see both functions have been added to the code. Now we can start making some changes.
using System;
using System.Collections.Generic;
using System.Linq;
using System.Text;
using System.Threading.Tasks;
using System.Windows;
using System.Windows.Controls;
using System.Windows.Data;
using System.Windows.Documents;
using System.Windows.Input;
using System.Windows.Media;
using System.Windows.Media.Imaging;
using System.Windows.Navigation;
using System.Windows.Shapes;

namespace image_gallery
{
    /// <summary>
    /// Interaction logic for MainWindow.xaml
    /// </summary>
    public partial class MainWindow : Window
    {

        int i = 1; // this integer will start with a 1

        public MainWindow()
        {
            InitializeComponent();
        }

        private void goNext(object sender, RoutedEventArgs e)
        {

        }

        private void goBack(object sender, RoutedEventArgs e)
        {

        }
    }
}
Above we have added an integer to the program and it will hold the value 1 inside it. This integer will be used to count up or down the pictures we have. Lets see how it works inside the goNext function.
        private void goNext(object sender, RoutedEventArgs e)
        {
            i++; // increase i by 1

            // if i's value gets larger than 6 then reset i back to 1

            if (i > 6)
            {
                i = 1;
            }

            // change the picture according to the i's value
            picHolder.Source = new BitmapImage(new Uri(@"pics/" + i + ".jpg", UriKind.Relative));
        }
Above is the go next function. In this function we are starting off by increasing the value of I by 1. We are using the i++ command to increase it, we can also use i+=1 or i=i+1 and so on, so i++ seems like the most efficient solution to this problem.
Next we have an if statement that’s checking if the value of I is greater than 6, if so then we can reset I back to the 1.
Last like in the function is displaying the image to the pic holder image we included in the XAML file earlier.
First we start off by saying picHolder.Source this will access the source part of the XAML file and allow us to change the value from the C# script. Then we are stating new BitmapImage meaning we are accessing the BitmapImage class from C# and loading our new values inside of it. Inside the brackets we are using the new Uri keyword which means the location of the file. Inside the other brackets we are using the @ sign and inside the quotations we have “pics/” -< this is the folder location. After that we are using the I meaning this will be seen as a value since it’s a integer so it will come up as 1, 2, 3, or 6 in the program. Lastly we have the file extension “.jpg”. Remember when we mentioned earlier you can use your own program, if you are then make sure they are JPG image files because this program is only looking for those if you aren’t then it will now show in the program.
Double check the code above and make sure that you have got it right, there are no red lines under the codes. Good lets move on to the goBack function.
        private void goBack(object sender, RoutedEventArgs e)
        {
            i--; // this will decrease 1 from i


            // if the value of i is less than 1
            // then give i the value of 6
            if (i < 1)
            {
                i = 6;
            }

            // change the picture according to the i's value
            picHolder.Source = new BitmapImage(new Uri(@"pics/" + i + ".jpg", UriKind.Relative));
        }
If you notice this function is similar to the go next function. In this function we are deducting the value from I and if I’s value goes below 1 then we are resetting I back to 6. The last code in the function is the same as the one before so there will be no confusion there.
Lets try to debug the program and see how it works.
![]()
Click on the start button to get the program running.
Below are the results.
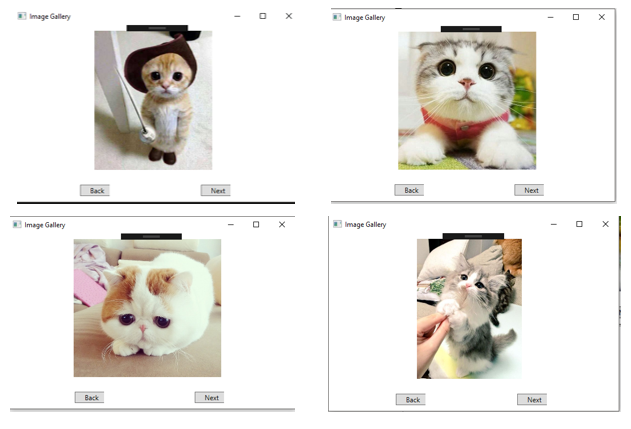
Its working really well. They are sooo cute and I’m not crying, someone’s cutting onions somewhere OK.
If you followed it through so far well done, you are free to add any images you want to, remember if you want to add your own images either change those images to a JPG extension or you can change the code to look for PNG, BMP, GIF or any other file types.
Happy coding, Moo out.
Hey bro thank you so much . You saved my life and my school life.